-
ChatBot 만들기 - 4) card 메세지 나타내기NODE.JS 2021. 5. 15. 11:34
다음으로 어떠한 메세지를 입력하면 다음과 같이 card들을 나타내는 기능을 만들 것이다.

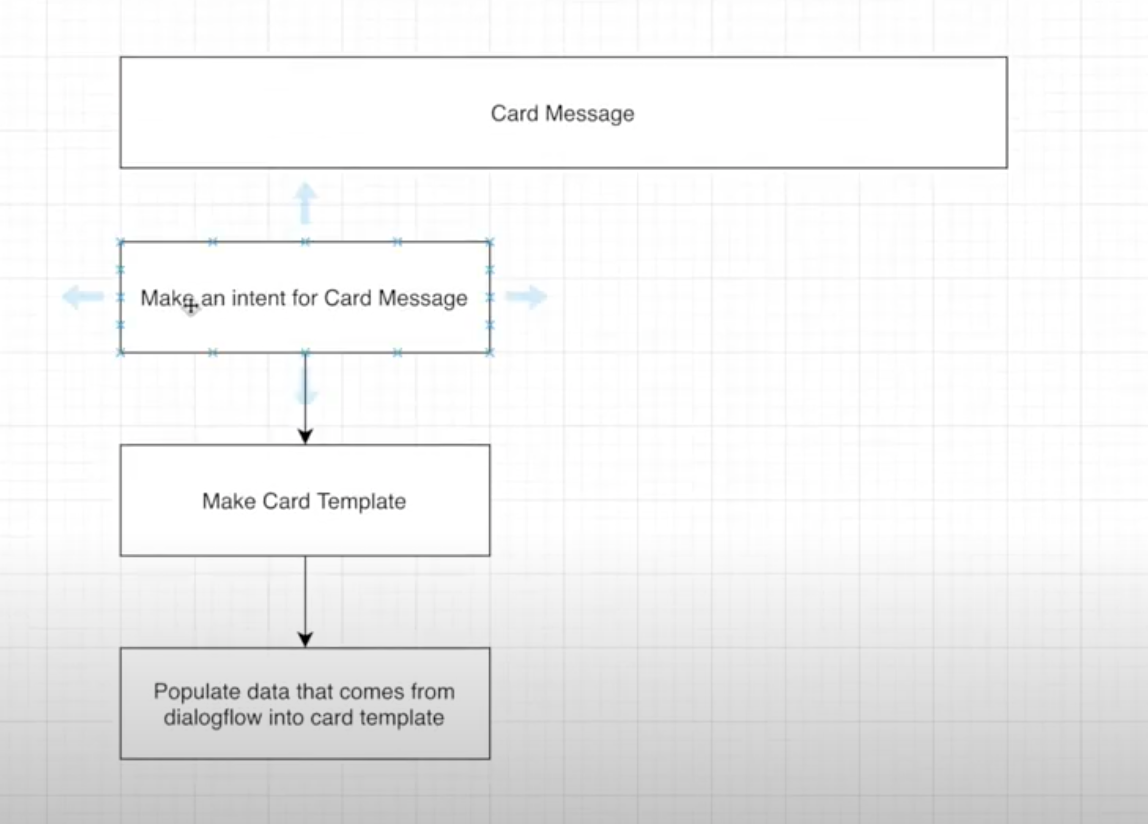
순서 우선 하나의 intent를 더 만들자.


이름은 card message 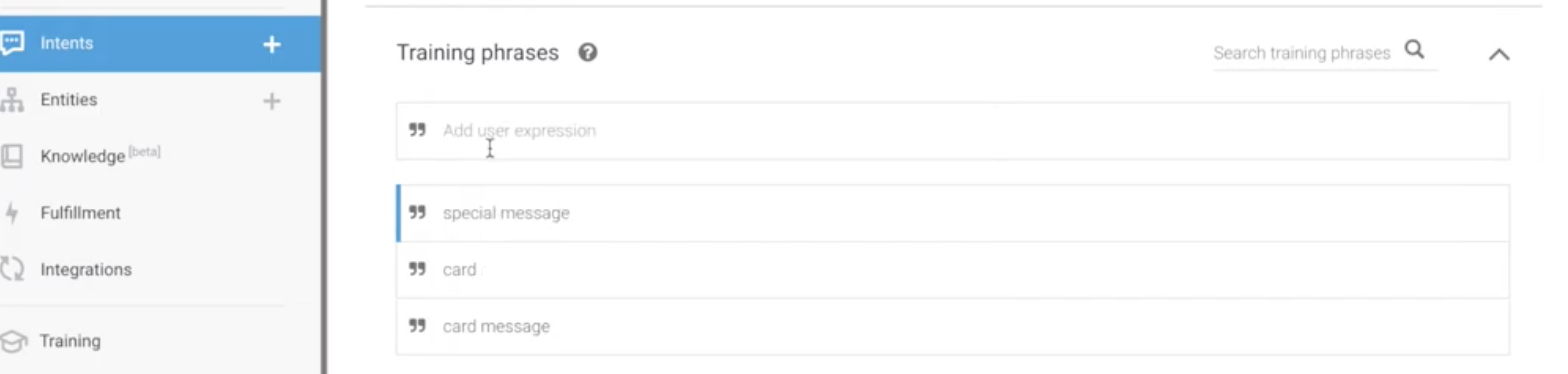
training phrases는 3개 
response는 custompayload로 하고 안에 들어갈 구성들을 적어준다. 
카드는 3개이므로 3개를 넣어준다. save 눌러서 저장해준다. 카드메세지의 구성도 넣어야 하니까 condition을 만들어준다.
(조건에 따라서 어떤 intent가 실행되는지)
    const renderOneMessage = (message, i) => {
        console.log('message', message)

        // we need to give some condition here to separate message kinds

        // template for normal text 일반 메세지를 작성했을 때
        if (message.content && message.content.text && message.content.text.text) {
            return <Message key={i} who={message.who} text={message.content.text.text} />
        }
        // 카드메세지를 입력했을 때
        else if (message.content && message.content.payload.fields.card) {

            const AvatarSrc = message.who === 'bot' ? <Icon type="robot" /> : <Icon type="smile" />
        // template for card message
            return <div>
                <List.Item style={{ padding: '1rem' }}>
                    <List.Item.Meta
                        avatar={<Avatar icon={AvatarSrc} />}
                        title={message.who}
                        description={}//card에 따라서 나타나는 것이 다르게끔 바꿔준다.
                    />
                </List.Item>
            </div>
        }


    }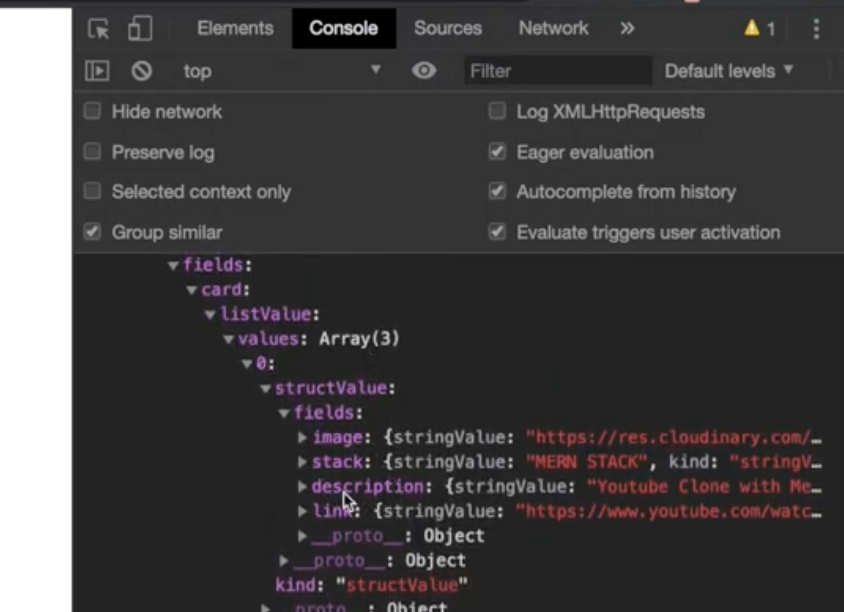
콘솔창을 확인해보면 card메세지일때는 fields.card를 확인할 수 있음을 알 수 있다. 카드들을 하나씩 모두 render하기 위해서 map을 사용한 renderCards함수를 만들어준다.

카드안에 3가지 value가 있는것을 확인할 수 있다. import Card from './sections/Card'; const renderCards = (cards) => { return cards.map((card,i) => <Card key={i} cardInfo={card.structValue} />) } const renderOneMessage = (message, i) => { description={renderCards(message.content.payload.fields.card.listValue.values)} }sections>Card.js component를 만들어준다.
(antd사용)

import React from 'react' import { Card, Icon } from 'antd'; const { Meta } = Card; function CardComponent(props) { return ( <Card style={{ width: 300 }} cover={ <img alt={props.cardInfo.fields.description.stringValue}//각각의 이미지에 대한 정보를 가져온다. src={props.cardInfo.fields.image.stringValue} /> } actions={[ <a target="_blank" rel="noopener noreferrer" href={props.cardInfo.fields.link.stringValue}>//링크에 대한 정보 <Icon type="ellipsis" key="ellipsis" /> </a> ]} > <Meta title={props.cardInfo.fields.stack.stringValue}//타이틀에대한 정보 description={props.cardInfo.fields.description.stringValue}//설명에 대한 정보 /> </Card> ) } export default CardComponent'NODE.JS' 카테고리의 다른 글
OnlineShop 만들기 - 1)mongoDB연결하고 업로드페이지 만들기 (0) 2021.05.15 ChatBot 만들기 - 5) actions추가하기 (1) 2021.05.15 ChatBot 만들기 - 3)frontend template 만들기 (textQuery, eventQuery Function + 리덕스로 메세지 저장하고 보여주기) (0) 2021.05.15 ChatBot 만들기 - 2) textQuery route와 eventQuery route만들기 (0) 2021.05.15 ChatBot 만들기 - 1)dialogflow setting (0) 2021.05.15