-
OnlineShop 만들기 - 13) Cart Page 만들기 4 ( paypal 기능 만들기)NODE.JS 2021. 5. 16. 18:37
paypal을 이용해서 금액을 지불하는 기능을 만들 것이다 .
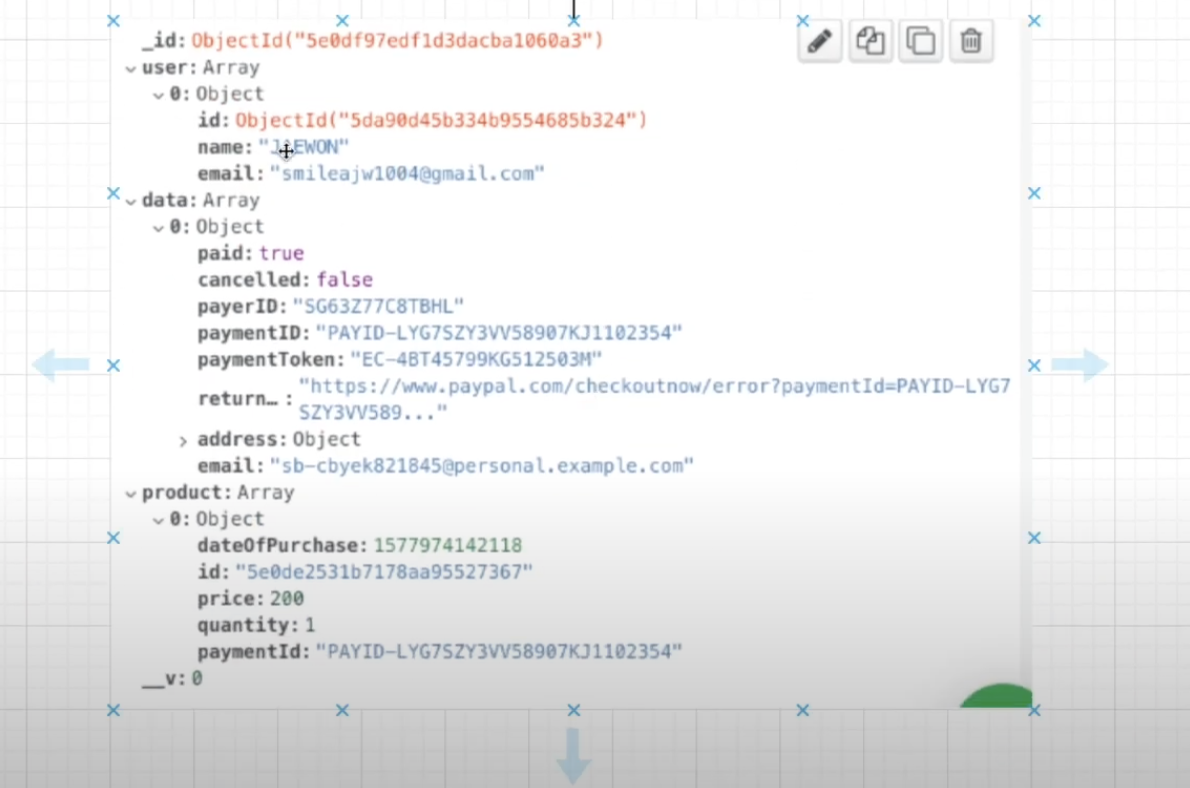
payment collection을 만들어서 다음의 데이터를 넣을것이다.
결제를 완료하고 나서는 카트를 비우고 결제수단을 user에 저장한다.
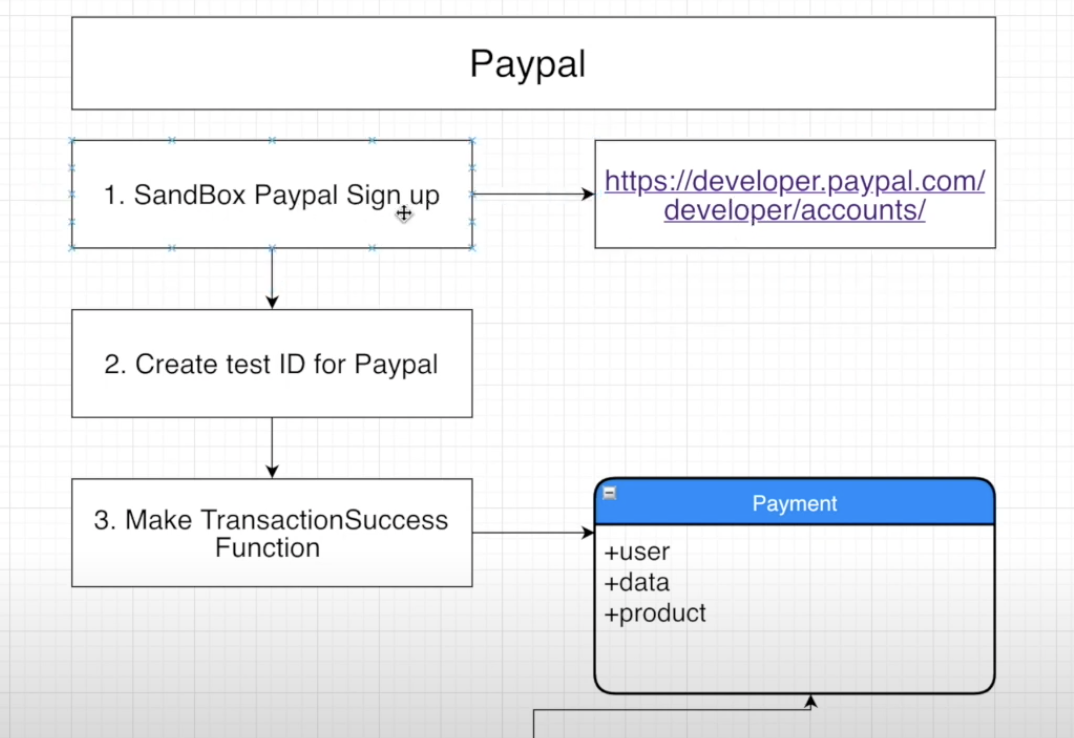


https://developer.paypal.com/developer/accounts
Sandbox accounts - PayPal Developer
developer.paypal.com
우선 사이트로 가서 가입하고
paypal id 를 생성한다.


설정변경 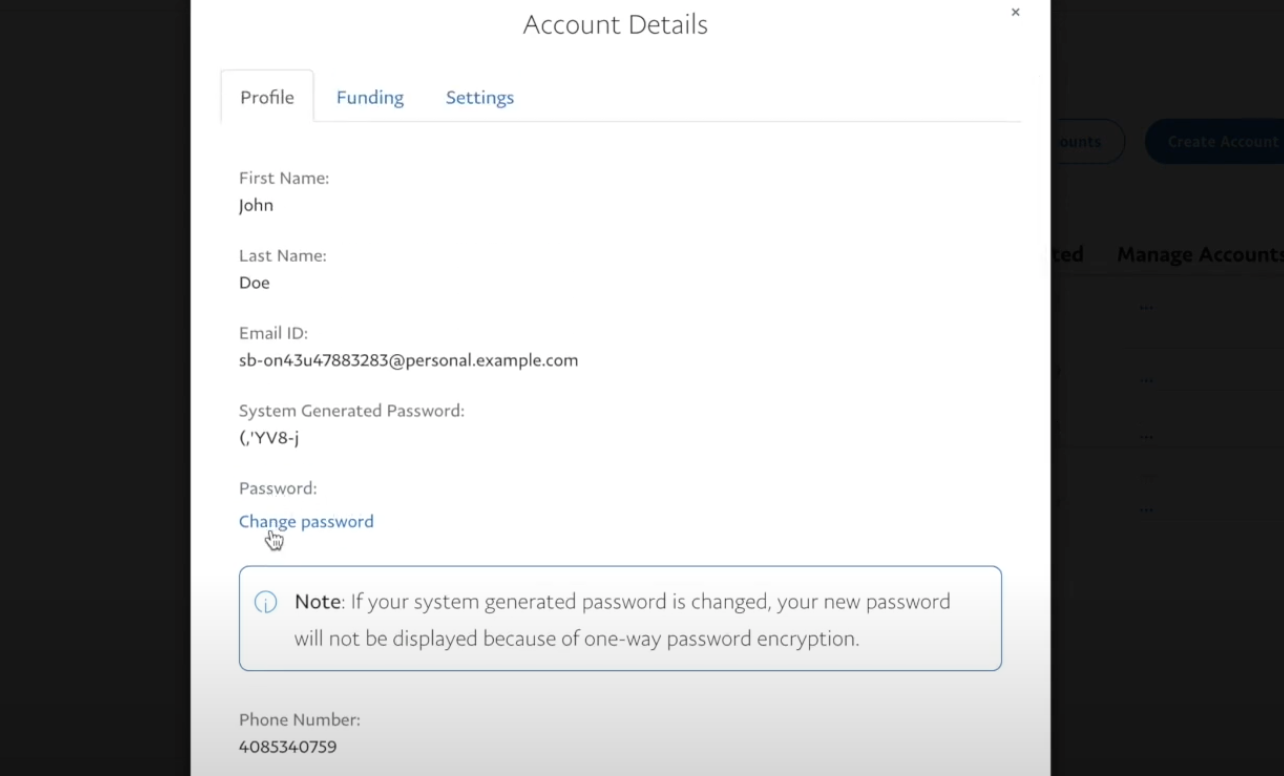
비밀번호 변경 다시 에디터로 와서 models>Payment.js에서 payment collection을 만들어 준다.
const mongoose = require('mongoose');
const paymentSchema = mongoose.Schema({
    user: {
        type: Array,
        default: []
    },
    data: {
        type: Array,
        default: []
    },
    product: {
        type: Array,
        default: []
    }


}, { timestamps: true })

const Payment = mongoose.model('Payment', paymentSchema);

module.exports = { Payment }
cart페이지에 paypal 버튼을 만들 것이다.
우선 client에 npm install react-papal-express-checkout --save해준다.
https://www.npmjs.com/package/react-paypal-express-checkout
react-paypal-express-checkout
React component that renders Paypal's express check out button
www.npmjs.com
utils안에 paypal.js파일을 만들어주자.
paypal 예시에 있는 문서를 그대로 복사한 다음, 몇가지 부분만 수정할 것이다.
스타일과 client부분을 수정한다.
여기서 sandbox(dev단계에서 사용하는것)부분은 우리가 페이팔에서 myapp을 만든 후 정보를 가져와서 입력해줘야한다.

app 생성 
이름과 계정 선택($ or ₩) 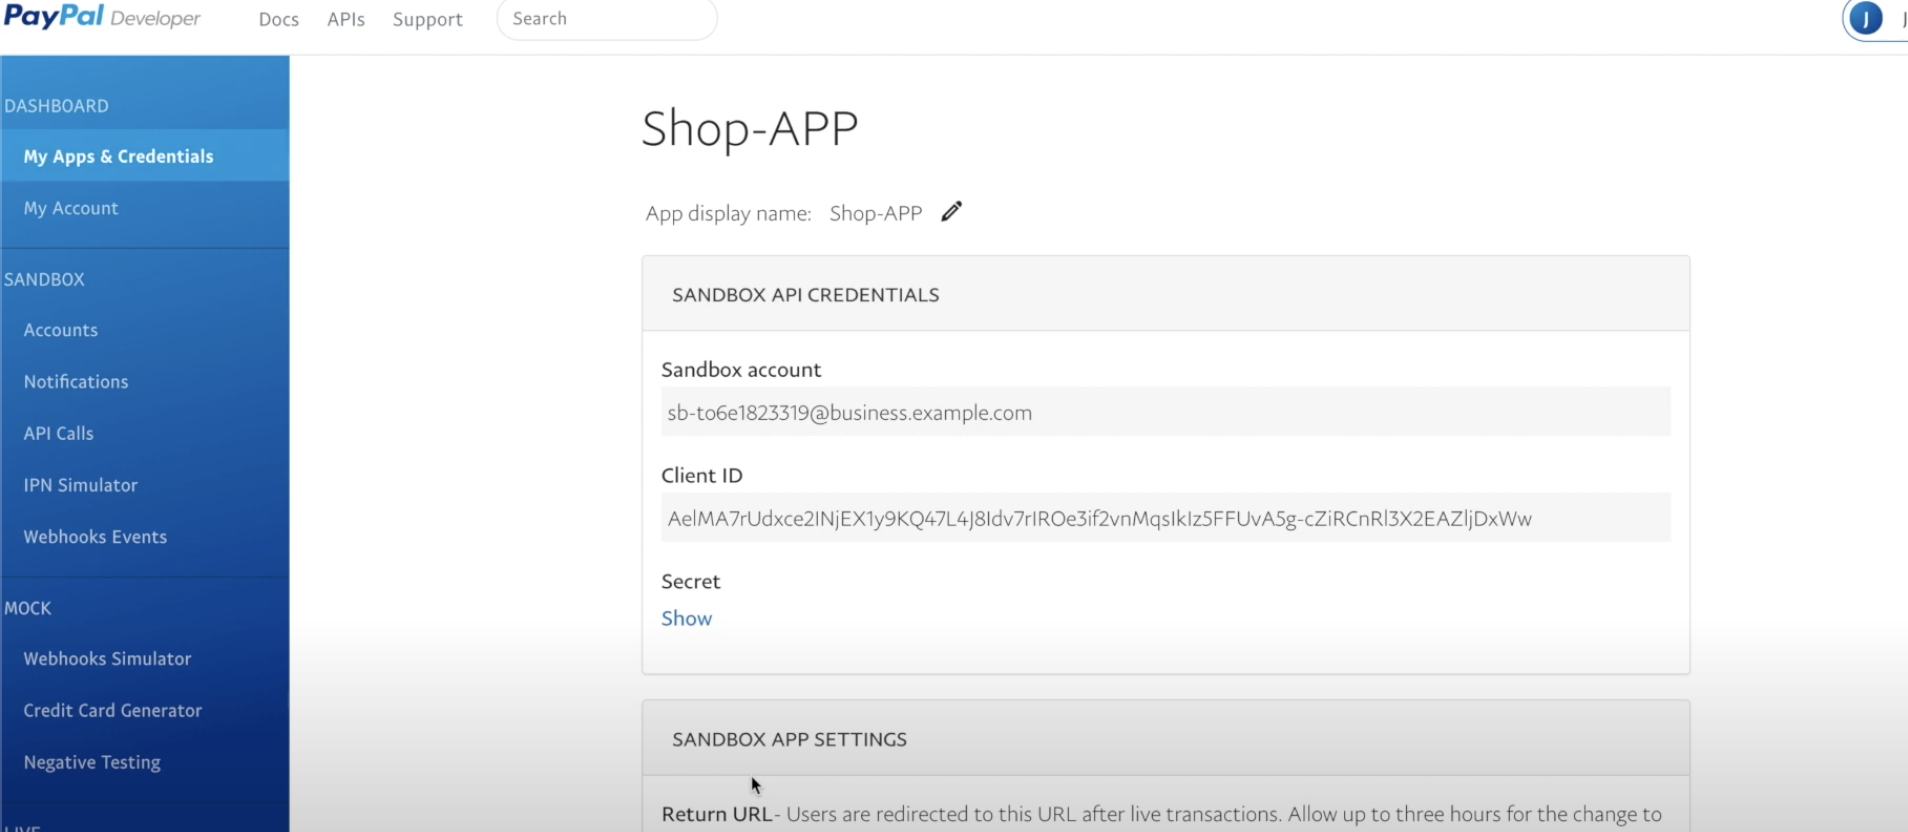
여기서 client id를 복사해서 Paypal.js에 넣어줄 것이다. cartpage에 paypal을 import 해준다.
import Paypal from '../../utils/Paypal';


            {/* Paypal Button */}

                <Paypal/>
Paypal.js 를 다음과 같이 수정한다.
import React from 'react';
import PaypalExpressBtn from 'react-paypal-express-checkout';

export default class Paypal extends React.Component {
    render() {
        const onSuccess = (payment) => {
            // Congratulation, it came here means everything's fine!
            		console.log("The payment was succeeded!", payment);
            		// You can bind the "payment" object's value to your state or props or whatever here, please see below for sample returned data
        }

        const onCancel = (data) => {
            // User pressed "cancel" or close Paypal's popup!
            console.log('The payment was cancelled!', data);
            // You can bind the "data" object's value to your state or props or whatever here, please see below for sample returned data
        }

        const onError = (err) => {
            // The main Paypal's script cannot be loaded or somethings block the loading of that script!
            console.log("Error!", err);
            // Because the Paypal's main script is loaded asynchronously from "https://www.paypalobjects.com/api/checkout.js"
            // => sometimes it may take about 0.5 second for everything to get set, or for the button to appear
        }

        let env = 'sandbox'; // you can set here to 'production' for production
        let currency = 'USD'; // or you can set this value from your props or state
        let total = 1; // same as above, this is the total amount (based on currency) to be paid by using Paypal express checkout
        // Document on Paypal's currency code: https://developer.paypal.com/docs/classic/api/currency_codes/

        const client = {
            sandbox:    'YOUR-SANDBOX-APP-ID',//우리 페이팔 웹사이트의 clientid에서 가져온다.
            production: 'YOUR-PRODUCTION-APP-ID',
        }
        // In order to get production's app-ID, you will have to send your app to Paypal for approval first
        // For sandbox app-ID (after logging into your developer account, please locate the "REST API apps" section, click "Create App"):
        //   => https://developer.paypal.com/docs/classic/lifecycle/sb_credentials/
        // For production app-ID:
        //   => https://developer.paypal.com/docs/classic/lifecycle/goingLive/

        // NB. You can also have many Paypal express checkout buttons on page, just pass in the correct amount and they will work!
        return (
            <PaypalExpressBtn env={env} client={client} currency={currency} total={total} onError={onError} onSuccess={onSuccess} onCancel={onCancel}
            style={{
                size:'large',
                color:'blue',
                shape:'rect',
                label:'checkout'
            }}
            />
        );
    }
dev단계에서 결제를 진행해보려면, 아까 만든 우리의 account(dev)를 이용해서 로그인한다. 
paynow 하면 그대록 계산이 진행된다. 
console창에서 확인 가능하다. 
paypal object의 속성들을 가지고 cartpage를 구성할 것이다. cartpage에서 paypal에게 4가지의 props를 전해줄것이다.
import {getCartItems, removeCartItem, onSuccessBuy} from '../../../_actions/user_actions'//redux를 이용하니 actions에서 가져와서 실행한다.
import Paypal from '../../utils/Paypal';


    const transactionSuccess = (data) => {//거래가 성사되었을 때
        dispatch(onSuccessBuy({
            cartDetail: props.user.cartDetail,
            paymentData: data
        }))
            .then(response => {
                if (response.payload.success) {
                    setShowSuccess(true)
                    setShowTotal(false)
                }
            })
    }


    const transactionError = () => {
        console.log('Paypal error')
    }

    const transactionCanceled = () => {
        console.log('Transaction canceled')
    }


    return (


            {/* Paypal Button */}

            {ShowTotal &&//showtotal이 true일 때만 보인다

                <Paypal
                    toPay={Total}//전체 가격
                    onSuccess={transactionSuccess}//거래가 성사 되었는지 확인
                    transactionError={transactionError}//오류가 발생했는지 확인
                    transactionCanceled={transactionCanceled}//취소되었는지 확인
                />

                }


        </div>
    )
}

export default CartPage
user actions에 추가
import axios from 'axios';
import {
    LOGIN_USER,
    REGISTER_USER,
    AUTH_USER,
    LOGOUT_USER,
    ADD_TO_CART_USER,
    REMOVE_CART_ITEM_USER,
    ON_SUCCESS_BUY_USER
} from './types';

export function onSuccessBuy(data) {

    const request = axios.post(`${USER_SERVER}/successBuy`, data)
        .then(response => response.data);

    return {
        type: ON_SUCCESS_BUY_USER,
        payload: request
    }
}
Types와 reducer에도 추가
export const ON_SUCCESS_BUY_USER = 'on_success_buy_user';import { LOGIN_USER, REGISTER_USER, AUTH_USER, LOGOUT_USER, ADD_TO_CART_USER, GET_CART_ITEMS_USER, REMOVE_CART_ITEM_USER, ON_SUCCESS_BUY_USER } from '../_actions/types'; case ON_SUCCESS_BUY_USER: return { ...state, userData: { ...state.userData, cart: action.payload.cart }, cartDetail: action.payload.cartDetail }paypal.js에도 props구문 추가.
import React from 'react';
import PaypalExpressBtn from 'react-paypal-express-checkout';

export default class Paypal extends React.Component {
    render() {
        const onSuccess = (payment) => {
            // Congratulation, it came here means everything's fine!
            		console.log("The payment was succeeded!", payment);
            		// You can bind the "payment" object's value to your state or props or whatever here, please see below for sample returned data
                    this.props.onSuccess(payment)
        }


		 let total = this.props.toPay; // same as above, this is the total amount (based on currency) to be paid by using Paypal express checkout
만약 리덕스가 아닌 axios로 payment success를 보낸다면,
    //Axios version
    //
    // const transactionSuccess = (data) => {//거래가 성사되었을 때
    // let variables= {
    //     cartDetail:user.cartDetail, paymentData: data
    // }
    // Axios.post('/api/users/successBuy', variables)
    //     .then(response=>{
    //         if(response.data.success){
    //             setShowSuccess(true)
    //             setShowTotal(false)

    //             dispatch(onSuccessBuy({cart: response.data.cart, cartDetail:response.data.cartDetail}))//useractions에 추가해야 한다.
    //         }else{
    //             alert('구매에 실패했습니다.')
    //         }
    //     })
    // }
user route는 다음과 같이 작성되는데,
누적 판매량을 업데이트 하기 위해서 async의 eachseries를 사용할 것이다.
npm install async --save를 해준다.
https://www.npmjs.com/package/async
async
Higher-order functions and common patterns for asynchronous code
www.npmjs.com
router.post('/successBuy', auth, (req, res) => {
    let history = [];
    let transactionData = {};

    //1.Put brief Payment Information inside User Collection
    req.body.cartDetail.forEach((item) => {
        history.push({//구매이력에 넣는다.
            dateOfPurchase: Date.now(),
            name: item.title,
            id: item._id,
            price: item.price,
            quantity: item.quantity,
            paymentId: req.body.paymentData.paymentID
        })
    })

    //2.Put Payment Information that come from Paypal into Payment Collection //user와 data와 product를 보내준다.
    transactionData.user = {
        id: req.user._id,
        name: req.user.name,
        lastname: req.user.lastname,
        email: req.user.email
    }

    transactionData.data = req.body.paymentData;
    transactionData.product = history


    User.findOneAndUpdate(//구매이력을 추가한다
        { _id: req.user._id },
        { $push: { history: history }, $set: { cart: [] } },//구매했으면 카트는 비워준다
        { new: true },
        (err, user) => {
            if (err) return res.json({ success: false, err });


            const payment = new Payment(transactionData)//mongodb에 저장한다.
            payment.save((err, doc) => {
                if (err) return res.json({ success: false, err });

                //3. Increase the amount of number for the sold information //누가구매했다면 판매량 증가시키기

                //first We need to know how many product were sold in this transaction for
                // each of products

                let products = [];
                doc.product.forEach(item => {
                    products.push({ id: item.id, quantity: item.quantity })
                })

                // first Item    quantity 2
                // second Item  quantity 3

                async.eachSeries(products, (item, callback) => {
                    Product.update(
                        { _id: item.id },
                        {
                            $inc: {//중가한다
                                "sold": item.quantity//구매한 내역의 판매량 증가해주기
                            }
                        },
                        { new: false },
                        callback
                    )
                }, (err) => {
                    if (err) return res.json({ success: false, err })
                    res.status(200).json({
                        success: true,
                        cart: user.cart,
                        cartDetail: []
                    })
                })

            })
        }
    )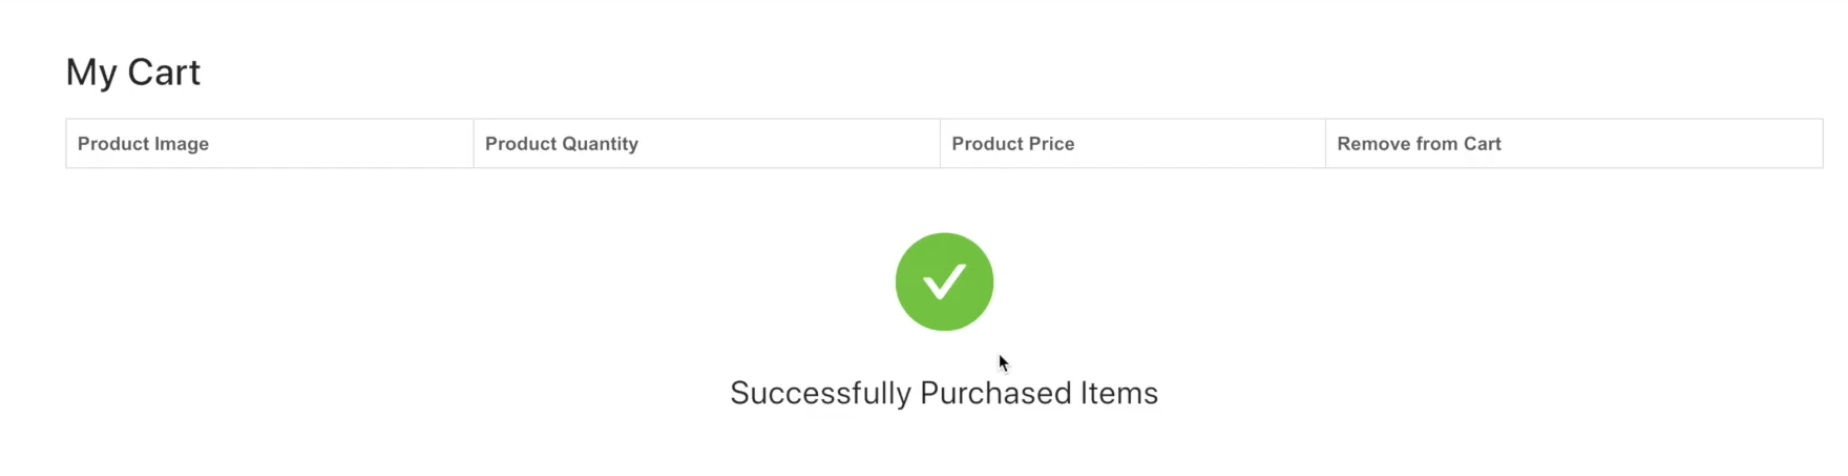
결제가 정상적으로 완료된다 'NODE.JS' 카테고리의 다른 글
Social Media 만들기 - 1)앱 만들기 전 Setup 하기 (0) 2021.05.20 OnlineShop 만들기 - 14) History 기능 만들기 (1) 2021.05.16 OnlineShop 만들기 - 12) Cart Page 만들기 3 (cart remove Function 만들기) (0) 2021.05.16 OnlineShop 만들기 - 11) Cart Page 만들기 2 (cart 페이지 템플릿 만들기) (0) 2021.05.16 OnlineShop 만들기 - 10) Cart Page 만들기 1 (cart정보 가져오기) (0) 2021.05.16